Tag Archives: Curtis

Safety Last?

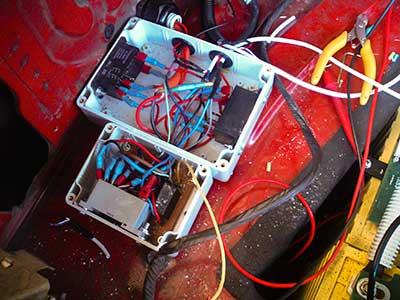
When it comes to EVs, some back-yarders may well be up there with the Harold Lloyd types, dangling on a high voltage precipice. What am I on about? You’ll recall my expensive BMS master controller I griped on about some time ago – it handles the high current charging brought into the car via a relay in the box which also houses the comms relay for battery management. The 12v line was built into the same box on a board my mother could have etched (actually, she’s pretty cool at offering board, so sorry Mom) and there were some safety/durability issues we were concerned with. Nakey’s actually got me a separate box for the 12v line, plus a separate relay box for the DC-DC converter for which I cut a hole out the other day in the opposite pillar from the charger. Keeping primary and secondary lines separate, and ensuring absolute safety against grounding the high voltage to the car is paramount.

Charge port relay and BMS housing.

Charge port relay and BMS housing.

Continue reading

Shaping Up Nicely

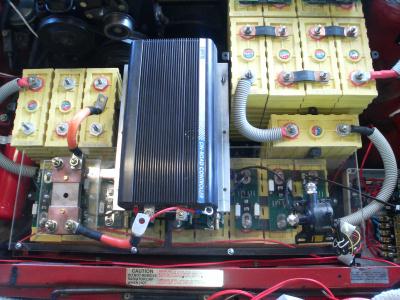
While my car still has a few issues to resolve, the engine bay itself is now looking prrrretty good. The Perspex has been cut to the right size and this will support the Curtis and water-cooling pump. The Curtis now has heatsink compound applied to it and the cooling block and sandwiched together – and with the batteries seen through the Perspex underneath, the whole thing looks pretty neat. The rest of the BMS modules will be installed soon.

Curtis and cooler on 8mm thick Perspex sheet.

Curtis and cooler on 8mm thick Perspex sheet.

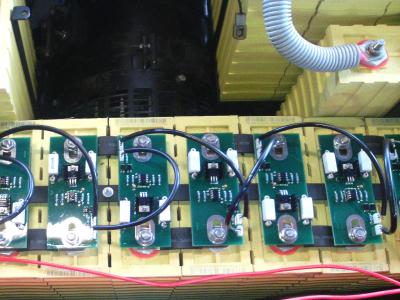
The batteries underneath show the Blade BMS modules connected with their comms fly-leads which is wired back to the Blade BMS Puppet Master box. The conformal coating will protect the BMS modules from dust, grit, corrosion etc.

BMS fly leads connected.

BMS fly leads connected.

Relay Box & Coolant Reservoir

The relay and fuse box is now mounted for the main components; the ancillary relay and fuse box will be done soon when we can find a suitable place for mounting. The coolant bottle will need to be fixed relatively level and this may be tricky due to lack of room and sloping firewalls. Shouldn’t be too hard, so long as the position of the bottle ensures good flow.

Continue reading

Time to Look at Curtis Cooling

Although mentioned previously, we’ve had to put it aside while working out where everything else is going to fit. As you know, the Curtis has a bunch of MOSFETS inside, ‘sinked’ to the base of the housing. Although efficiency can be improved in a controller design, simple immediate solutions can involve better cooling. Some folks attach the controller to a suitable flat metal surface on the car which in effect becomes a giant heatsink while others add fan arrays on top, or do both. Chunky Curtis heatsink fins are also available.

With space at a premium, a flat aluminum cooling block is used instead, fixed to the underside of the controller. In my case, the cooling block has been made to sink the heat from this area with the help of conduits drilled through the block for coolant ingress.

A pump is used to circulate coolant through the Curtis and my old interior radiator, with a return hose to the pump and an overflow reservoir with possible expansion valve (we are yet to test expansion for this amount of coolant; some thoughts below). The block itself is screwed to the base of the Curtis and thermal heatsink compound is applied between the surfaces, such as good quality silver compound for high thermal conductivity. At present it’s just a chunk of aluminum; I wonder if it should be anodized to 5> microns for better heat sinking? Better still, a block fabricated with an optimized fin-array would be nice but that may be over doing it. I have a couple of other ideas about flow but haven’t CAD’d them up yet.

Anyway, liquid cooling is much preferred over affixing bulky fans and jutting heat sinks, and is more effective. If there was room, both options could be possible, with a temperature sensor to cut in the fans – but correctly-configured liquid-cooling may negate the necessity of added thermal solutions altogether as it should allow extended peak times under load and therefore higher continuous operation – great for those steep hills etc.

Pump Action

What type of pump? One that’s typically used for water-cooling fast processor chips, from Xoxide. It’s pretty robust and will run off the accessories. Clear hoses will be used so we can see the coolant.
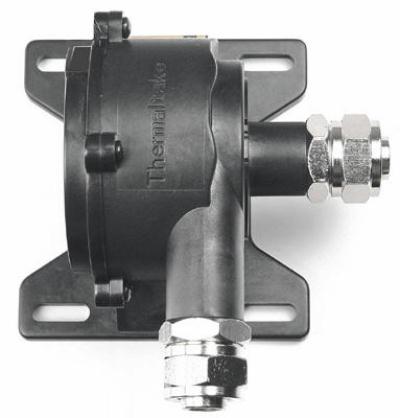
Not much to look at, but simple and well built makes it last.

Not much to look at, but simple and well built makes it last.

Continue reading

Time To Get The Accessories Sorted and Install Safety Breaker

For accessories, a DC to DC converter (such as the Curtis 1410) is used to buck down the 144v (actually higher on peak charge) from the Thunderskys to an isolated 12-14 volt source for accessories such as lights, radios, airhoon, ahem I mean horn etc (which an alternator would otherwise handle in a gas car).

DC-DC converters can also be set up to charge an accessories battery and I’ll probably use a smaller gel-cell (had originally put aside an Optima D36 but weight and space were an issue -and the Optima weighs 25kg!). Although you can get away using the traction pack instead, I prefer a separate accessories battery.

Continue reading